Pages

Showing posts with label Appetizers. Show all posts

Sunday, January 22, 2012

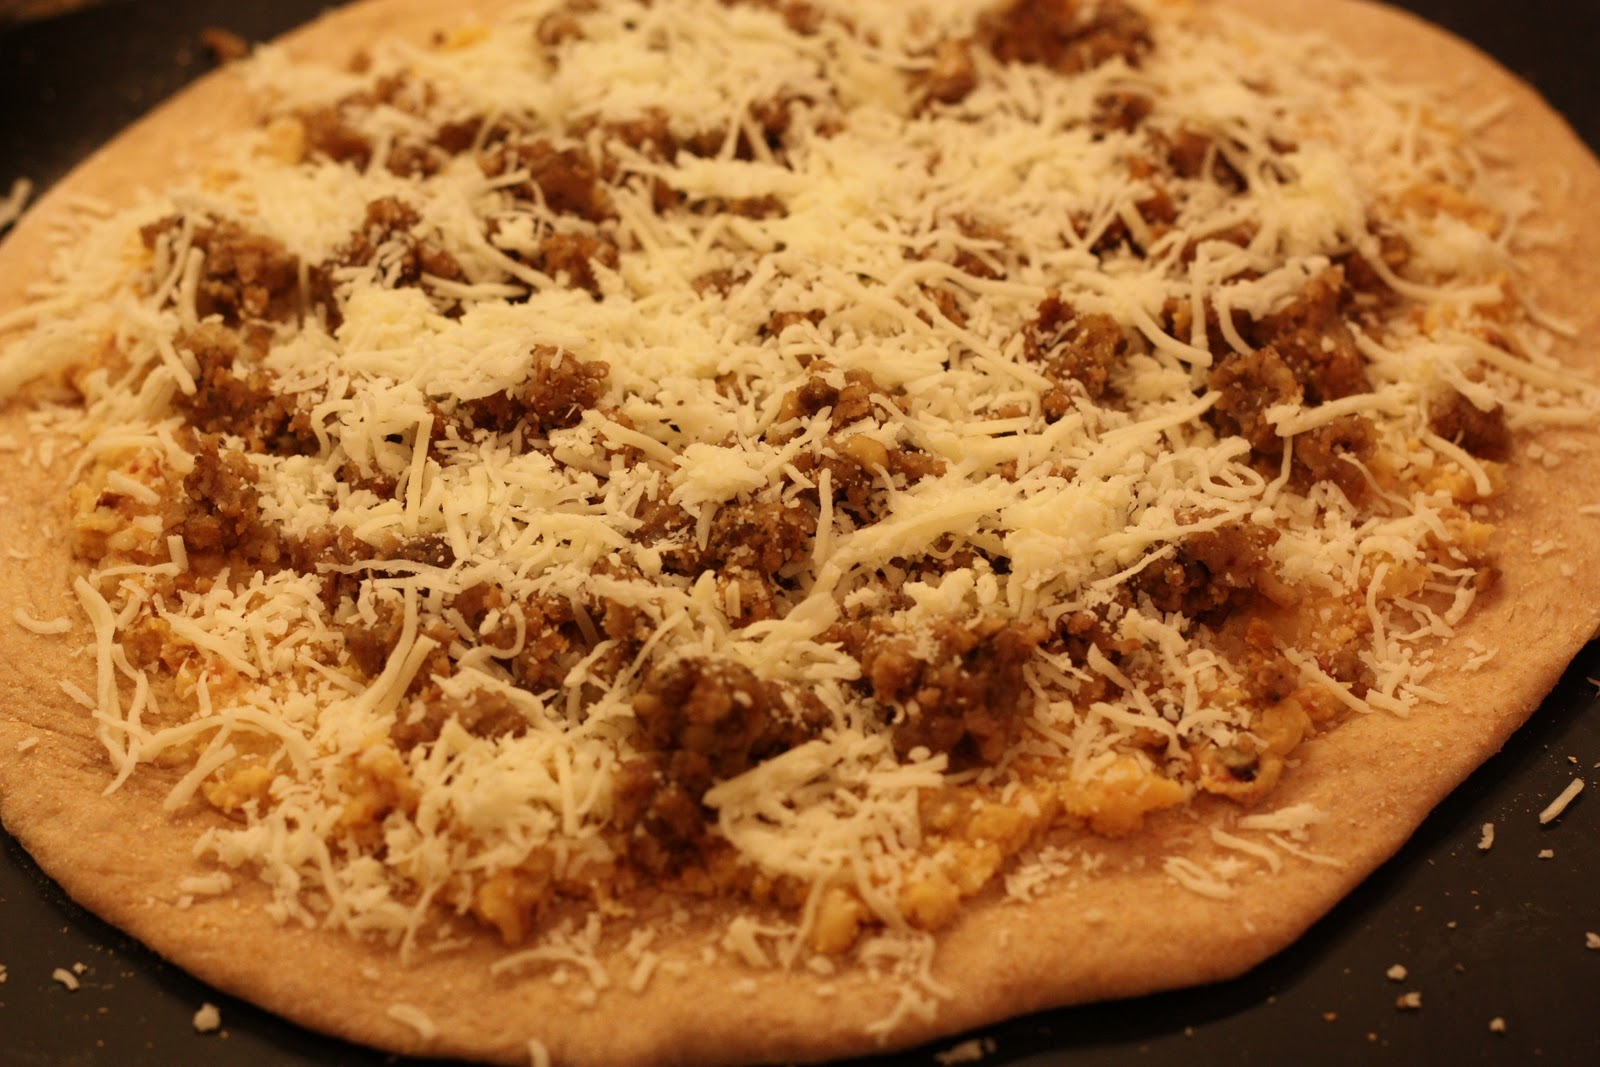
Holiday Leftover Pizza


         The holidays are a great time to eat lots of food, and try everyone’s new twist on classic favorites (like Sweet Potato Brulee!). After a while I get so tired of having even remixed classics that I end up freezing a lot of the leftovers to eat later.
            When I opened my freezer and saw my holiday section, I saw the same leftovers that I grew tired of a couple of months ago. I decided to go on an adventure and look for a new way to dress up the leftovers! I ended up looking in California Pizza Kitchen’s Family Cookbook where they had a pizza that used a lot of the leftovers that I still had.
            This recipe is extremely versatile and you can make it with whatever leftovers you have from almost any holiday time (my frozen leftovers were from Thanksgiving). It may sound weird, but this pizza was very delicious. I initially scoffed at the idea of topping the pizza with cranberry sauce, but when I tried it on the pizza I ended up adding more to the top of it! It gave the rich cheesy potatoes and stuffing a sweet and tart tang. I will be making this pizza after next year’s holidays, and may even make it the day after (it was really that good!).
Ingredients
            Pizza Dough (I made California Pizza Kitchen’s Honey Wheat Pizza Dough)
            Left over Cheesy potatoes
            Left over Stuffing
            Leftover Turkey (cut into small bit size pieces or smaller)
            Mozzarella Cheese
            Leftover Turkey Gravy
            Leftover Cranberry Sauce (I made homemade Cranberry-Apple Sauce for Thanksgiving)

Directions
1.     Place baking stone or pizza pan in an oven and then preheat to 450 degrees Fahrenheit (make sure the stone/ pan is hot before you put the prepared pizza on it!).
2.     Roll dough to about 9 inch circle (I halved the Honey Wheat Pizza dough).
3.     Heat the potatoes, stuffing, and gravy.
4.     Lightly mash the potatoes if there are large chunks and then carefully spread onto the dough.  Make sure that it does not go completely to the edge so that a crust will appear while baking.
I put a silicon mat under the pizza, so easily put it on my baking stone.
5.     On top of the potatoes add crumbles of the stuffing, top with cheese, then add the turkey pieces on top of the pizza.
6.     Drizzle the gravy on the pizza and then add numerous small “dots” of cranberry sauce to the top of the pizza.  (Remember to put more than you see in my pictures).  Alternatively, if you’re still apprehensive about the cranberry sauce, you can let people decide how much to put on their own pieces.  If you do it this way though, the flavors won’t mix as much.


7.     Bake in the preheated oven for about 8- 10 minutes, until crust is golden. Serve with the rest of the cranberry sauce.


Greta is happy to be back in the limelight, and that I am blogging again :)

CPK- Honey Wheat Pizza Dough


This pizza crust is from California Pizza Kitchen, and I always get this crust option when going there. It has an almost nutty taste, and is so delicious. I used this crust when I made the Holiday Leftover Pizza, but could it be made with any pizza recipe.

Honey-Wheat Pizza Dough:
  • 1 teaspoon active dry yeast
  • 1 cup plus 1 tablespoon warm water (105º-110ºF)
  • 1 cup unbleached flour
  • 1 1/2 cups whole wheat flour
  • 1 tablespoon plus 2 teaspoons honey
  • 1 teaspoon salt
  • 1 tablespoon plus 1 teaspoon extra-virgin olive oil
Ingredients
1. Dissolve the yeast in the warm water and set aside for 5 to 10 minutes. 

2. Combine all other ingredients (except the olive oil) in an electric mixer with the paddle versus the dough hook and then mix with the yeast. (Do not pour the salt directly into the yeast water) 

3. Once mixed flour your surface and knead the dough for 5 minutes. 

4. Lightly oil the dough ball with the olive oil and spray a glass bowl with cooking spray. Put the dough in the bowl and seal the bowl with plastic wrap. Set in room temperature room for 1 ½ to 2 hours (to double in size).


This is the unrisen dough (the top picture is after rising for the first time)

5. Punch the dough, re-form into a round ball and put it back into the bowl with plastic wrap. Place the bowl in the fridge overnight.

6. About 2 hours before you want to the make pizza, take the dough from the fridge. Divide the dough into 2 equal sized balls. 

7. Let the dough sit for about 2 hours to double in size again.

Wednesday, November 9, 2011

Bacon and Corn Chowder


Inspired by  Cooking Light


I love making soups in the fall when the weather starts to get cold and this soup is a new recipe that I decided to try.  The mixture of bacon and corn is a great fall flavor with jalapeños for a tex-mex flair.  You can adjust the amount of the jalapeños for the perfect amount of spice for you.  I tried roasting the corn in the oven, and it didn't work very well, so I don't recommend it.  Overall, this recipe is really easy to make, quick, and healthy too!

Ingredients
  • 2 bacon slices
  • ¼ Vidalia onion (diced)
  • ¼ red bell pepper (diced)
  • 2 (16-ounce) packages frozen corn  (thawed)
  • 2 cups skim milk
  • 1/2 teaspoon salt
  • 1/4 teaspoon freshly ground black pepper
  • 3/4 cup shredded extra-sharp cheddar cheese
  • Half of a jalapeño without the membrane or seeds

Directions
1.     Cook bacon in a large soup pot until crisp, then remove the bacon from the pot. Crumble the bacon by either cutting with a knife or tearing the bacon apart with your hands.
2.     Add onion and red pepper to the undrained pan and cook until tender and caramelized. Add Jalapeños to warm them.

 
3.     Add one of the bags of corn to the pan and heat. Also add the crumbled bacon.

4.     Place the other bag of corn into a blender with 1 cup of the milk and blend until smooth.

5.     Add the corn/milk puree to the vegetables in the pan and stir in the other cup of milk, salt and pepper to taste. Also add cheese.

6.     Cook over medium heat until cheese is melted (do not boil).
7.     Serve.


Sunday, October 9, 2011

Bacon Meatballs


Inspired by EvilShenanigans


I was using  StumbleUpon and came across this recipe many times and finally decided to make it. As meatballs these were not very good, they were dry (somehow even though there was a pound of bacon) and not flavorful enough. However, I think these might be good if they were shaped into patties and then eaten as hamburgers instead of meatballs. I did pair the meatballs with a sweet / smoky BBQ sauce and this helped counteract the dryness.


Ingredients
           
·      1 pound bacon (I used Plumrose Smokey Maple)

·      1 ½ pound ground beef

·      2 teaspoons salt

·      2 teaspoons smoked paprika

·      2 teaspoons dry oregano

·      1/2 teaspoon black pepper

·      1/2 teaspoon crushed red pepper

·      1 egg


Directions

1.     Cut the bacon into 1 inch pieces and pulse in a food processor until no longer in large chunks

Greta's picture is here instead of food processed bacon, see notes below for the reason why.

2.     Add the bacon to a large bowl and then add all of the other ingredients.

3.     Mix the meat until completely combined.
I used a two tablespoon spoon to measure the meatballs, which worked great.

4.     Ball the meat to about 1 inch to 1 ½ inches in diameter and place into a preheated pan and brown on all sides.
Pre Browned

Browned.


5.     To a preheated oven 400 degrees Fahrenheit add the meatballs and cook for about 10- 15 minutes. 
After bakes, definitely set on paper towel to drain the grease.


Here are the meatballs with the BBQ sauce.

Notes

·      You may want to try cooking the bacon beforehand, and then crumbling it into the ground beef.

·      FYI: the bacon is really gross when processed in the food processor.
 

Wednesday, September 7, 2011

Baked Chicken Nuggets


I really like chicken nuggets, but they are made from mechanically separated chicken  (which before cooking looks like a strawberry milkshake [gross!]) and are usually deep fried. I try to eat healthy, and found this recipe online. I may feature more recipes from Gina's Skinny recipe, because she has some really good ideas for simple, healthy recipes. These are great for an appetizer with your favorite dipping sauce or even as a main entrée (If making as an entrée simply add more chicken).

In the orginal recipe it says to spray with olive oil and then bake. DO NOT spray, this makes the chicken not get crispy (Thanks to a reader that emailed me about this!)


The finished product
  
Ingredients

2 Large Boneless Skinless Chicken Breasts

½ cup extra virgin olive oil

6 Tbs. Italian Breadcrumbs

2 Tbs. Panko Breadcrumbs

2 Tbs. grated parmesan cheese

Olive Oil Spray

Directions

1.     Cut chicken into small bit size pieces. Put oil in one bowl and breadcrumbs, Panko and Parmesan cheese into another.


If the chicken is cut about this size the chicken comes out perfectly cooked


2.     Place chicken, a few at a time, into the oil, then into the breadcrumbs until each piece is completely coated. Then put on a baking sheet. Continue with this process until all chicken pieces are coated.

The breading setup


3.     Once all pieces are on the baking sheet bake for 8-10 minutes in a 475 degrees Fahrenheit oven. Flip then cook for an additional 4-5 minutes or until all the way cooked. 

I used a Pyrex dish, a regular baking sheet would work as well


This is about what the nuggets should look like once done.


Greta was eyeing the nuggets, and was sad when I said no.


Monday, August 29, 2011

Fried Mac and Cheese Balls

Inspired by Marc Matsumoto

A couple months ago I went to Honest Johns and they had fried Mac and Cheese, which was absolutely delicious (and certainly not low calorie). So I was surfing the Internet, using StumbleUpon and came across this recipe. I think they turned out pretty well, though I did make a few mistakes. I think next time I make these I will add extra cheese, since I wanted more cheese flavor.

Ingredients:

Good Ole Kraft Mac and Cheese.
2 tablespoon butter
2 tablespoon flour
3/4 cup half and half
1 teaspoon kosher salt
1 cup Mac and Cheese (I used Kraft, but using leftovers would work perfectly)

1 cup Panko breadcrumbs
1/2 cup flour
1 egg (beaten)
Oil for frying (I used Extra Virgin Olive Oil)

Directions:
1.      Melt the butter in a saucepan. Once melted, add the flour and whisk until the flour is mixed in and the mixture is bubbling.
2.      Whisk in the milk, making sure that there are no lumps in the mixture. Heat this mixture until thickened. Then add the Mac and Cheese and stir.
3.      The Mac and cheese now must be cooled to room temperature (or no longer hot) and then put in the fridge to chill.
4.      Once cooled take out mixture and take out about 2 Tablespoons of the Mac and Cheese. Roll to make a ball, and try to press hard in order to remove air.
5.      Preheat the Deep fryer to 320* F. Meanwhile get three bowls set up for the ½ cup flour, egg, and the Panko breadcrumbs. One bowl is for the flour, another for the egg, and the third for the Panko.
6.      Take one of the Mac and Cheese balls and roll it in the flour, then roll it in the egg, and finally roll it in the Panko. 

The Rolled Mac and Cheese Balls with flour, egg, and panko.
7.      Carefully put the rolled Mac and cheese balls into the deep fryer, turning a couple times and cooking until golden brown. This should take about 6 minutes or so. 

This is before the mac and cheese balls were flipped.
The Kitchen helper was banished from the kitchen during frying... She was not happy about that.


8.      Once cooked place on a paper towel to remove extra oil and serve.

Notes:
*I messed up the recipe by adding the butter/flour/dairy mixture to the entire box of Mac and Cheese, so when rolling them into balls they did not stick together well.
* I used skim milk instead of half and half, which may have worked fine if I only put it into 1 cup of Mac and cheese.
* Once my Mac and Cheese was cooled I put it into the freezer for about 10 minutes, in order for it to firm up more. This also helped later when rolling them.
* These can be served with Ranch or even with a cheese sauce, but are great plain.


Recommended Products: